Thursday, August 10, 2017

Bead Weaving Necklace Pattern


Beautiful and easy to make Bead Weaving Necklace Pattern. You won't believe how fast this necklace works up. You can also use the same pattern to make a bracelet to match.

A = Miyuki, 11° SEED bead 
B = Miyuki, 8° SEED bead


Start by waxing and stretching your thread. Tie in a “stopper” bead, leaving about a 8-10” tail and begin at step #1.
1. Pick up 1B, 19A, go with thread up through the 1 B bead just added.
2. Pick up 3A, 1B, 2A, go with thread down through the 13th through 17th A beads, step #1 (first time) or the 10th through 6th A beads, step #6 (every time after).
3. Pick up 2A, 1B, 3A, go with thread up through the 1 B bead just added.
4. Pick up 9A, go with thread up through the 1 B bead, step #3.
5. Pick up 3A, 1B, 2A, go with thread down through the 7th through 3rd A beads, step #4.
6. Pick up 12A, go with thread up through the 1 B bead, step #5.
7. Continue by repeating steps #21 through #31 until the necklace is the length that you would like.
8. To add clasp, pick up 3A, clasp, 3A, go with thread up through 1 A and 1 B beads in necklace. Continue with thread around through the clasp beads several times for strength. Weave the working thread into the necklace and end. Repeat the clasp directions in the same manner at the other end of necklace after removing the stopper bead.


Bead Weaving Necklace Pattern, N0365
http://www.SandraDHalpenny.com
Sandra D. Halpenny 2017 All rights reserved
This pattern may not be copied or distributed in any way without the express written permission of the author. The purchaser of this pattern may use the finished piece for personal use and for selling at arts and crafts shows, etc. No mass production of this design is permitted without permission from the author.


Thursday, July 20, 2017

Maple Leaf Pattern and basic Brick Stitch - Learn How

This cute little Maple Leaf is made following a graph and using the Brick Stitch. 
Below I have included basic direction on how to work the brick stitch.


This Maple Leaf Pattern is made using Miyuki Delica Beads, size 11°. I used color #295. Makes a cute necklace drop or earrings.

Basic Beaded Brick Stitch 

D = Delica Bead
1. ROW 1, Pick up 2 D beads, go with thread up through the 1st D bead and down through the 2nd D bead. Stack the beads next to each other as shown.
Go with thread back up through the first bead and then back down through the second bead.

2. Pick up 1 D bead and go with thread down through the last D bead added in step #1, and up through the D bead just added in this step.
3. Pick up 1 D bead and go with thread up through the D bead added in the last step, and down through the D bead just added in this step.
4. Pick up 1 D bead and go with thread down through the D bead added in the last step, and up through the D bead just added in this step.
5. ROW 2, Pick up 2 D beads and go with working thread around the thread between the last 2 D beads in the previous Row, and then back up through the 2nd D bead just added in this step.

6. Pick up 1 D bead and go with working thread around the thread between the 2 D beads in the previous Row as shown, and then back up through the D bead just added in this step.
7. Pick up 1 D bead and go with working thread around the thread between the 2 D beads in the previous Row as shown, and then back up through the D bead just added in this step.
8. Pick up 1 D bead and go with working thread around the thread between the 2 D beads in the previous Row as shown, and then back up through the D bead just added in this step.
9. ROW 3,working in the opposite direction add this Row of beads as was done in step #5 through step #8.
Continue to repeat Rows 2 and 3 until you reach the length that you want.

Maple Leaf Free Pattern
http://www.SandraDHalpenny.com
Sandra D. Halpenny © 2002 - 2024 All rights reserved
Canadian Intellectual Property Office, This pattern may not be copied or distributed in any way without the express written permission of the author. You may use the finished piece for personal use and for selling at arts and crafts shows, etc. No mass production of this design is permitted without permission from the author

Wednesday, June 14, 2017

Small Wave Bracelet Pattern


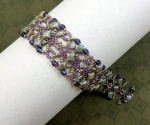
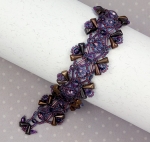
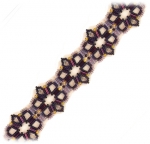
This pattern was originally called "Dime Store Bracelet" because all the beads were purchased at my local WalMart. I wanted to show that you didn't have to spend a lot if you wanted to try some basic bead weaving.


A
= blue, 11
Czech seed beads
B = purple, 11
Czech seed beads
C = crystal AB, 4mm crystals
Start by waxing and stretching your thread, use Nymo D or C-Lon & a #11 or #12 beading needle. Tie in a “stopper” bead, leaving about an 8” tail and begin at step #1. *Fireline 6lb. crystal fishing line also works great for bead weaving.


1. Pick up 2A, 2B, 1C, 2B, 2A, 7B, go with thread forward through 2 A, 2 B, 1 C, 2 B, 2 A, and the 1st and 2nd B beads (of the 7B) just added in this step.


2. Pick up 4A, go with thread forward through the 1st, 2nd and 3rd B beads (of the 7B), step #1 or step #13.


3. Pick up 3A, go with thread down into the 2nd and 1st A beads, step #2, and forward through the 3rd and 4th B beads (of the 7B), step #1 or step #13.


4. Pick up 5A, go with thread down into the 2nd and 1st A beads, step #3, and forward through the 4th and 5th B beads (of the 7B), step #1 or step #13.


5. Pick up 3A, go with thread down into the 2nd and 1st A beads, step #4, and forward through the 5th, 6th and 7th B beads (of the 7B), step #1 or step #13.

6. Pick up 2A, go with thread down into the 2nd and 1st A beads, step #5, forward through the 6th and 7th B beads (of the 7B), step #1 or step #13. Continue with working thread forward through the top beads coming out with thread down through the 2 A beads, step #1 or step #13 as shown.


7. Pick up 2B, 1C, 2B, 2A, 7B, go with thread down through the 2 A beads, step #1 or step #13 as shown, forward through 2 B, 1 C, 2 B, 2 A and the 1st and 2nd B beads (of the 7B), just added in this step.


8. Pick up 4A, go with thread forward through the 1st, 2nd and 3rd B beads (of the 7B), step #7.


9. Pick up 3A, go with thread down into the 2nd and 1st A beads, step #8, and forward through the 3rd and 4th B beads (of the 7B), step #7.


10. Pick up 5A, go with thread down into the 2nd and 1st A beads, step #9, and forward through the 4th and 5th B beads (of the 7B), step #7.


11. Pick up 3A, go with thread down into the 2nd and 1st A beads, step #10, and forward through the 5th, 6th and 7th B beads (of the 7B), step #7.


12. Pick up 2A, go with thread down into the 2nd and 1st A beads, step #11, forward through the 6th and 7th B beads (of the 7B), and step #7. Continue with working thread forward through the bottom beads coming out with thread up through the 2 A beads, step #7 as shown.


13. Pick up 2B, 1C, 2B, 2A, 7B, go with thread up through the 2 A beads, step #7 as shown, forward through 2 B, 1 C, 2 B, 2 A and the 1st and 2nd B beads (of the 7B), just added in this step.


14. Continue bracelet by repeating steps #2 through #12.  And then continue bracelet by repeating steps #13 and #2 through #12 until the bracelet fits.


Small Wave Bracelet Pattern (originally called, Dime Store Bracelet), B0265
http://www.SandraDHalpenny.com
Sandra D. Halpenny 2015-2017 All rights reserved
This pattern may not be copied or distributed in any way without the express written permission of the author. The purchaser of this pattern may use the finished piece for personal use and for selling at arts and crafts shows, etc. No mass production of this design is permitted without permission from the author.

Tuesday, May 2, 2017

Pearls and Gold Bracelet Pattern


This pretty bracelet is easy to make and uses a handful of seed beads and 3mm fire-polished crystals. When finished it looks like delicate lace around your wrist.
 
This Pattern is Free here on my Blog.
To Purchase a Downloadable PDF for $1.99
Click HERE
 
A = Miyuki® #593, 11/0 seed bead
B = Miyuki® #301, 11/0 seed bead
C = 3mm Fire-polished, Crystal Capri

Start by waxing and stretching your thread, use Nymo D or C-Lon & a #11 or #12 beading needle. I used Fireline 6lb. crystal.  Tie in a "stopper" bead, leaving about an 12" tail and begin at step #1.
     

1. Pick up 1C, 3B, go with thread forward through the C and 1st and 2nd B beads just added in this step.


2. Pick up 8A, go with thread forward through the 1st and 2nd A beads just added in this step.


3. Pick up 6B, go with thread forward through the 1st B bead just added in this step and the 3rd and 4th A beads added in step #2.


4. Pick up 2B, 1C, 1B, go with thread forward through the 1st b bead just added in this step and the 5th and 6th A beads, step #2.


5. Pick up 6B, go with thread forward through the 1st B bead, just added in this step, the 7th and 8th A beads, step #2, the 2nd B bead, step #1, the 1st and 2nd A beads, step #2, the 1st A bead, step #3, the 3rd and 4th A beads, step #2 and the 1st and 2nd A and 1 C beads, step #4.


6. Pick up 3B, go with thread down through the C bead, step #4 and forward through the 1st and 2nd B beads just added in this step.


7. Repeat steps #2 through #4. Pick up 6B, go with thread forward through the 1st B bead, just added in this step, the 7th and 8th A beads, step #2 and up through the 3rd B bead, step #6.


8. Pick up 3A, go with thread right to left through the 1st B bead, step #4 or #7(c) and up through the 5th and 6th A beads, step #2 or #7(a) and the 6th B bead, step #5 or #7(d).


9. Pick up 3A, go with thread left to right through the 2nd A bead, step #8.


10. Pick up 2A, 4B, go with thread down through the 2nd ans 3rd A beads, step #9, the 2nd A bead, step #8 and up through the 2 A and 1st and 2nd B beads just added in this step.
 

11.  Pick up 1B, go with thread down through the 3rd and 4th B beads, step #10, the 2nd and 3rd A beads, step #9, the 2nd A bead, step #8 and up through the 1st and 2nd A beads, step #10.


12. Pick up 1A, go with thread down through the 2nd and 1st B beads, step #7(d). following blue line in drawing weave through with working thread, coming out at the 1st B bead, step #6.


13. Pick up 3A, go with thread up through the 3rd B bead, step #4 or #7(c), down through the 4th and 3rd A beads, step #4 or #7(a) and the 2nd B bead, step #4 or #7(b).
  
14. a) Pick up 3A, go with thread left to right through the 2nd A bead, step #13.
b) Pick up 2A, 4B, go with thread forward through the 2nd and 3rd A beads, this step at (a), the 2nd A bead, step #13 and through the 2 A and 1st and 2nd B beads just added in this step.
c) Pick up 1B, go with thread forward through the 3rd and 4th B beads, this step at (b), the 2nd and 3rd A beads, this step at (a), the 2nd A bead, step #13 and the 1st and 2nd A beads, this step at (b). 
d) 
Pick up 1A, with working thread follow blue line up in drawing, coming out with thread down at the 1 C bead added in step #7(c).

15. Continue bracelet by repeating steps #6 through #14 until it fits.


16. To add clasp, pick up 4A, clasp, 4A, go with thread up through the C bead in bracelet. Continue with working thread around through the clasp beads several times. Weave the working thread into the bracelet and end. Repeat the clasp directions in the same manner on the other end after removing the stopper bead.


Pearls and Gold Bracelet Pattern, B0165
http://www.SandraDHalpenny.com
Sandra D. Halpenny © 2007 - 2017 All rights reserved

Canadian Intellectual Property Office
This pattern may not be copied or distributed in any way without the express written permission of the author. The purchaser of this pattern may use the finished piece for personal use and for selling at arts and crafts shows, etc. No mass production of this design is permitted without permission from the author


Reversible 3-D Bracelet Pattern

Bouquet Bracelet Pattern